
Polishing the Frame
This is the part that generally takes a few weeks to a few months. You could probably do it all in a day or two if you worked constantly, but you'll probably get tired after a few hours. The key to this is patience, it won't look good right away, it takes lots of sanding, scrubbing, and polishing to make it look right.
Materials:
Aircraft grade Paint Stripper (This stuff is nasty to get on you or breathe in a lot)
Masking tape
Plastic sheets (preferably with some thickness to them, not garbage bags)
Filter mask
Safety goggles
Bucket of water (incase you get the stripper on you, and rinsing parts)
Paint brush
Towels
Empty metal can (not too big, like a coffee can)
Steel wool grades #1, #00, and #0000
Sandpaper Sheets (For electric Sander, Grits 60,100,150,320,400,600,1000,1500,2000)
Aluminum Polish (Mothers for most of it)
Aluminum Polish (AutoSol to finish it off, very good shine)
Electric sander (not the rotary one, just the one that shakes)
Electric Buffer (High speed, 3000rpm or so)
Front/Rear Stands for the bike to sit on
Ratchet set, screw drivers, pliers, any other tool to disassemble bike
Empty 4Litre jugs, siphon.
Part 1 - Disassemble the bike and remove paint
Before we start polishing, we need to disassemble the bike. We took almost everything except the engine off the bike. Remove your Fairings, nose section, tail section, gas tank, footrests, wheels, and kickstand. We also drained and removed the radiator, because we wanted to remove the exhaust (leaving it on makes it hard to polish the swing arm). The radiator was in the way of us getting the headers off, so it was removed. This is where the $L jugs and siphon come into play. Then remove the headers/exhaust, this is pretty easy on a newer ZX6R with stock exhaust, other bikes may vary.
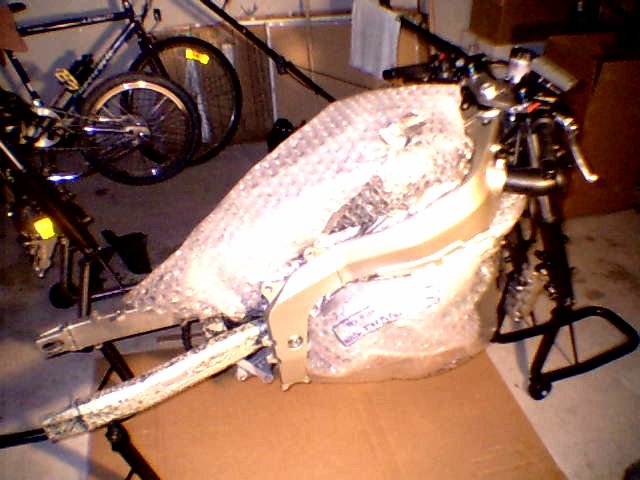
Once your bike is disassembled, it should look something like this (except without the front wheel/fender)
Next you want to put plastic over the engine, instruments, and anything else you don't want the paint to come of off. Use masking tape to ensure nothing will get under the plastic and on onto any of the parts you will not be polishing. Once done your bike should look similar to this (ignore the swing arm, it already has stripper on it in this pic)...
I would suggest not taking the paint off anywhere you can't see when the bike is together. For example do not take the paint off the inside of the frame, or at the very front of the swing arm near the pivot. This is because once the paint is removed and you polish it, the metal will oxidize, so you need to polish it from time to time. Now I don't know about you, but I don't want to totally disassemble my bike every couple weeks. I don't mind removing my fairings, but I don't want to removing my rear wheel, suspension, and other stuff that often...
Now it's time to begin stripping the paint. We used Aircraft grade aluminum paint stripper. This is the stuff that comes in a big tin and has the consistency of pudding. The spray on types do not work nearly as well as this stuff. Unless you are working in a VERY well ventilated area, I would suggest a breathing mask as this stuff is quite toxic. A pair of goggles is a good idea, and a set of thick rubber gloves will save you from a lot of burns.
Apply the stripper with the paintbrush, put it on liberally, not huge globs but thicker the if you were just painting something. You should see the paint begin to bubble within a minute or two. Let it sit for a few minutes then start scrubbing either with a cloth or the same paintbrush, and add more good as you go. The paint will come off in little sheets and/or chunks. Most areas will peel off easier then a bannana peel, but some parts, like in the picture below, might take a little longer.

The Rough cast area is a bit of a pain, we'll talk more about it later.
Keep applying the stripper on the bike wherever you want to remove the paint. Some areas might need a couple coats if there are little crevices and the like. Once you are done, the bike should look similar to the above picture. The majority of the bike is quite smooth and half polished already (as seen above, this is before any polishing done)
For the sub frame, which is not shown in this picture, you again want to only remove paint where it will be visible. Put the stripper on those areas the same way as the rest of the frame. The metal may look sort of rough, but it's not. When we get to the steel wool it will smooth that right out.
Once you get all the paint removed you want removed, its a good idea to rinse the bike off thoroughly. The stripper we used was water soluble, so water neutralizes it. Be careful not to get water into any critical parts of the bikes internals..
Part 2 - Sanding
Now it's time to begin sanding, there is not a lot that really needs much sanding, other then the above mentioned rough cast area. For this area (which is the part the swing arm and sub frame connect to) the metal is rough, and needs to be sanded smooth. We begun with 60 grit sandpaper on the electric sander. Go over the whole area several times, it might take a couple sheets of paper. Now move up to the 100 grit, and repeat, then the 320, 400,600, and 1000. It will not look very good at this point, but it gets better, don't worry. Once you get to 1000, you might want to go over the rest of the frame as well. While the rest of the frame is quite smooth, you might notice some small patterns or hairline marks in the metal from the factory. These might bother you later, so you might as well get rid of them now. Go over the rest of the frame with the 1000,1500, and 2000 grit sand paper. Some areas are hard to get at, and might require you do do it by hand depending on how big your sander is.
One word of caution, if you plan on using a Dremel tool to get into the small areas, be careful. Do not have the speed set to high, because it will not sand evenly if you are doing it freehand, you'll see little ridges and dips from where you sanded for more or less time.
The more you go over it, the better its going to look. Especially with the rough cast area, you might get it up to 2000 grit and then notice little pits in the metal, if you see this go back down to at least 320 and see if that removes it. If not, go back to 100. If it does remove it, go back up through the grits again.
Once you are happy with your sanding job, and everything looks smooth (it still wont look good at this point, but it should be nice and smooth) you can go onto the steel wool phase.
Next Page - Steel Wool and Polishing!